Add AI Chatbot to your website
Chatbot v2
We have made changes to the chatbot that lets you configre Data hub and Contact us sections. You can use the v2 currently by adding an attribute version-number="2" in the <script>
<script src="https://docsai.app/embed.min.js" version-number="2" project-id="<your_project_id>" async></script>Custom Coded Websites
You can get the project-id from settings page
Embed a chatbot in your website
- Open your website's
index.htmlfile in a text editor. - Paste the script just before the
</head>tag.
<script src="https://docsai.app/embed.min.js" version-number="2" project-id="<your_project_id>" async></script>- Replace the
<your_project_id>placeholder with your own chatbot's project ID. - Your chatbot will be embedded in your website. Visitors to your website will be able to click on the chatbot icon to start a conversation.
Identify users (Optional)
The values should be set in the window object whenever the page loads.
<script>
  window.DOCS_AI = {
    userId: "u_id_1234xyt81qlgs",
    // userId can also be email or your system identifier
    additionalFields: {
      userEmail: "shriharipapa@gmail.com",
      name: "Shrihari Mohan",
      userId: "clfp289qe0000mc0umct1zxeq",
      avatarUrl : "https://lh3.googleusercontent.com/a/AGNmyxZogCHpz"
    }
}
</script>- Set the
DOCS_AIobject to thewindowso that it is accessible to the chatbot whenever the user clicks the chatbot icon. DOCS_AIobject can only have 2 fieldsuserIdandadditionalFields.- The script is customizable and can be adapted to your specific needs.
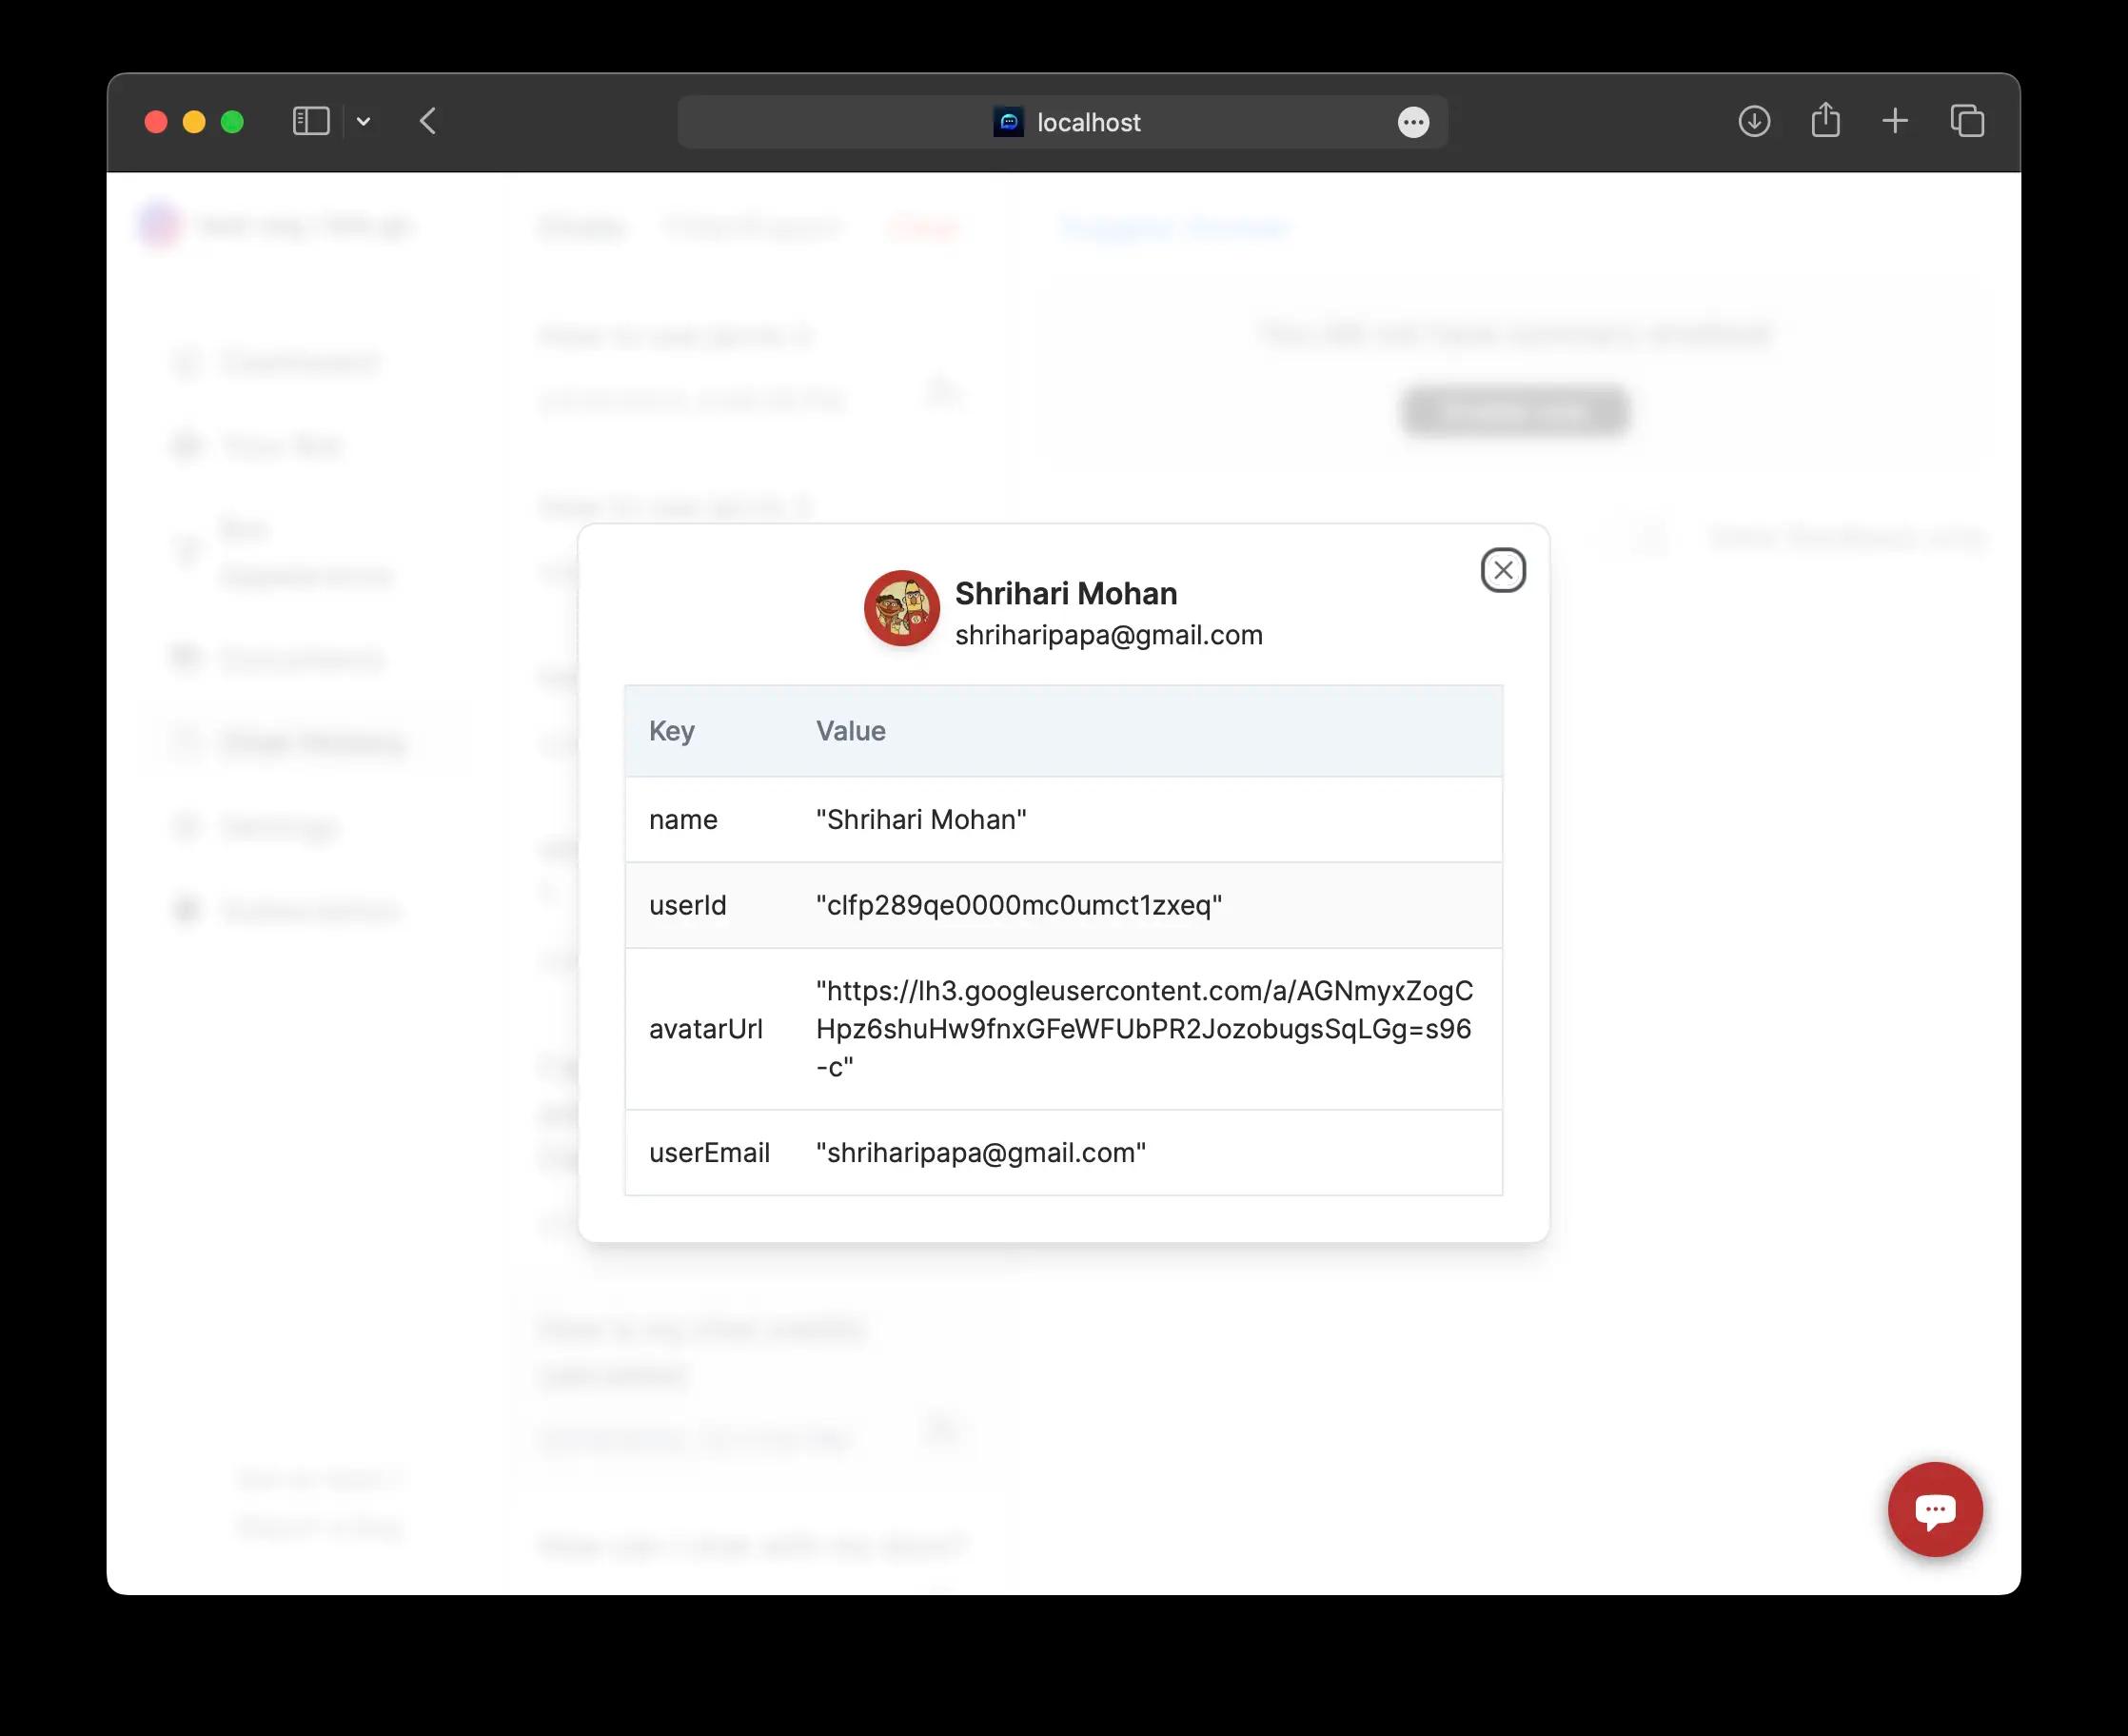
Having certain fields in your additionalFields will help you improve the user interface in your chat history.
Use name , avatarUrl and userEmail to get a contact card at the top and all the fields will appear in the table
If you are having problems with chatbot, please see the troubleshooting guide.
Wordpress
Using a wordpress plugin we can easily embed a chat bot in your wordpress site. Learn how to add JS Plugin (opens in a new tab). In this we're going to use WPCode (opens in a new tab) plugin.
- Install and activate the free plugin on your site.
- Go to Code Snippets → + Add Snippet in your WP Admin.
- Hover over the option to Add Your Custom Code (New Snippet) and choose Use Snippet.
- Add a title to help you remember what the snippet does. You’re the only person who will see this.
- Set the Code Type equal to JavaScript Snippet.
- Add the below code for your snippet to the Code Preview. The plugin will automatically add the opening and closing
<script>tags so you don’t need to include that portion of the JavaScript snippet. - The most important options here are the Insertion settings. You can add your snippet sitewide to the header, footer, or body. For important snippets, you should choose the header, though the footer is slightly better from a performance perspective.
For visual references (opens in a new tab) use docs from official website.
<script src="https://docsai.app/embed.min.js" project-id="<your_project_id>" version-number="2" async></script>Integrators
We support other website builders, such as Webflow, Wix, and Squarespace, which allow you to insert the <script> tag.
Troubleshooting
The chatbot widget is not visible on your website.
If you are seeing this , it means that the <script> tag is not loading on your website. Please check the HTML source code to ensure that the tag is correct.
The chatbot widget is loading, but the project it is trying to connect to is not found.
This means the project-id is incorrect. Make sure you get the valid project-id from your settings.
Identifying users not working , there is no users in the chat history
To identify the problem, you can inspect the browser log. To do this, open the developer tools in your browser and navigate to the console tab. Once the chatbot icon appears, you should see three logs in the console window.
🤖 Intializing your chat bot
🤖 Docsai chat loaded
🤖 Docsai chat body loaded
After clicking on the chat icon, you should see an additional log appear in the console window.
This log should contain all of the data that you are trying to send to DocsAI.
If the log does not contain any values, then the DOCS_AI object in the window object is not set properly.
🤖 Sending to docsai

{
    "userId": "u_id_1234xyt81qlgs",
    "additionalFields": {
        "userEmail": "shriharipapa@gmail.com",
        "name": "Shrihari Mohan",
        "userId": "clfp289qe0000mc0umct1zxeq",
        "avatarUrl" : "https://lh3.googleusercontent.com/a/AGNmyxZogCHpz"
    }
}
Make sure the data is received at the chat also. You can verify this by changing the top console window to chat-iframe .

🤖 Received identification
{
    "userDetails": {
        "userId": "u_id_1234xyt81qlgs",
        "additionalFields": {
          "userEmail": "shriharipapa@gmail.com",
          "name": "Shrihari Mohan",
          "userId": "clfp289qe0000mc0umct1zxeq",
          "avatarUrl" : "https://lh3.googleusercontent.com/a/AGNmyxZogCHpz"
        }
    },
    "source": "docsai"
}
This 🤖 Sending to docsai and 🤖 Received identification log should apperar whenever the chat bot opens.
If all this is happening to you and you still not see users in your chat history contact hey@docsai.app